Email template
The visual editor creates responsive emails for desktop, mobile, and web views without requiring manual HTML authoring.
Before you begin
Prepare the subject, content, and visual assets for the email. Also verify the alias, sender, and domain that the template will use.
Create the template
- Open Templates and select Create template → Email. You can also open the Email tab and select Create template.
- Complete Name, Category, Language, and Description.
- Enter Subject, Alias, Sender, and Domain.
- Wait for the visual editor to finish loading.
- Add sections and blocks to the canvas, then adjust their properties in the side panel.
- If the content uses variables, provide their examples, links, or files under Dynamic mapping.
- Review the design and select Save to continue later or Publish when it is ready.
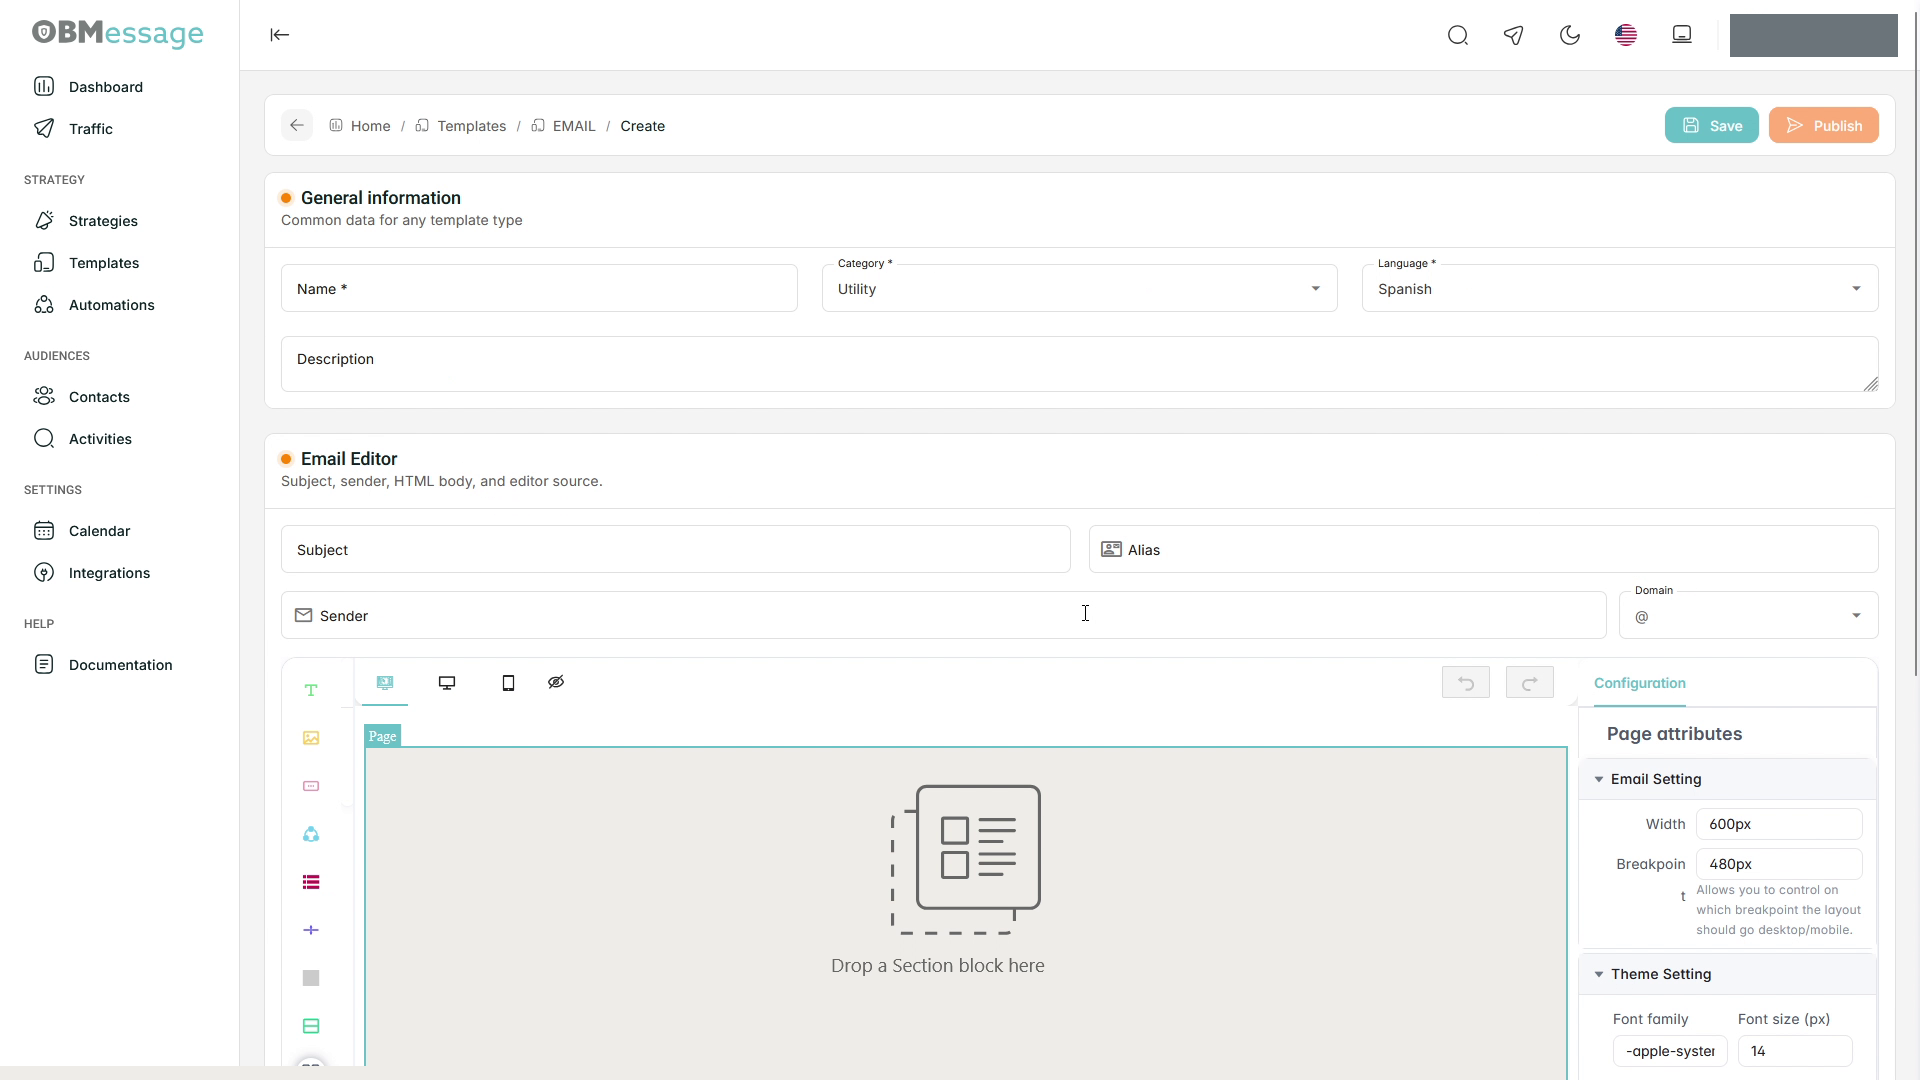
Editor blocks
- Section: organizes content into columns; the initial configuration uses two.
- Text: adds written content and exposes text attributes.
- Image: adds an image and exposes its properties.
- Button: adds an action that can direct recipients to a link.
- Social: groups links to three or more social networks.
- Navigation bar: adds navigation links to the message.
- Divider: visually separates content.
- Spacer: adds blank space between blocks.
Select a block to edit its attributes.
Configuration and variables
The Configuration / Page attributes panel controls the overall width, breakpoint, font, font size, line height, and colors.
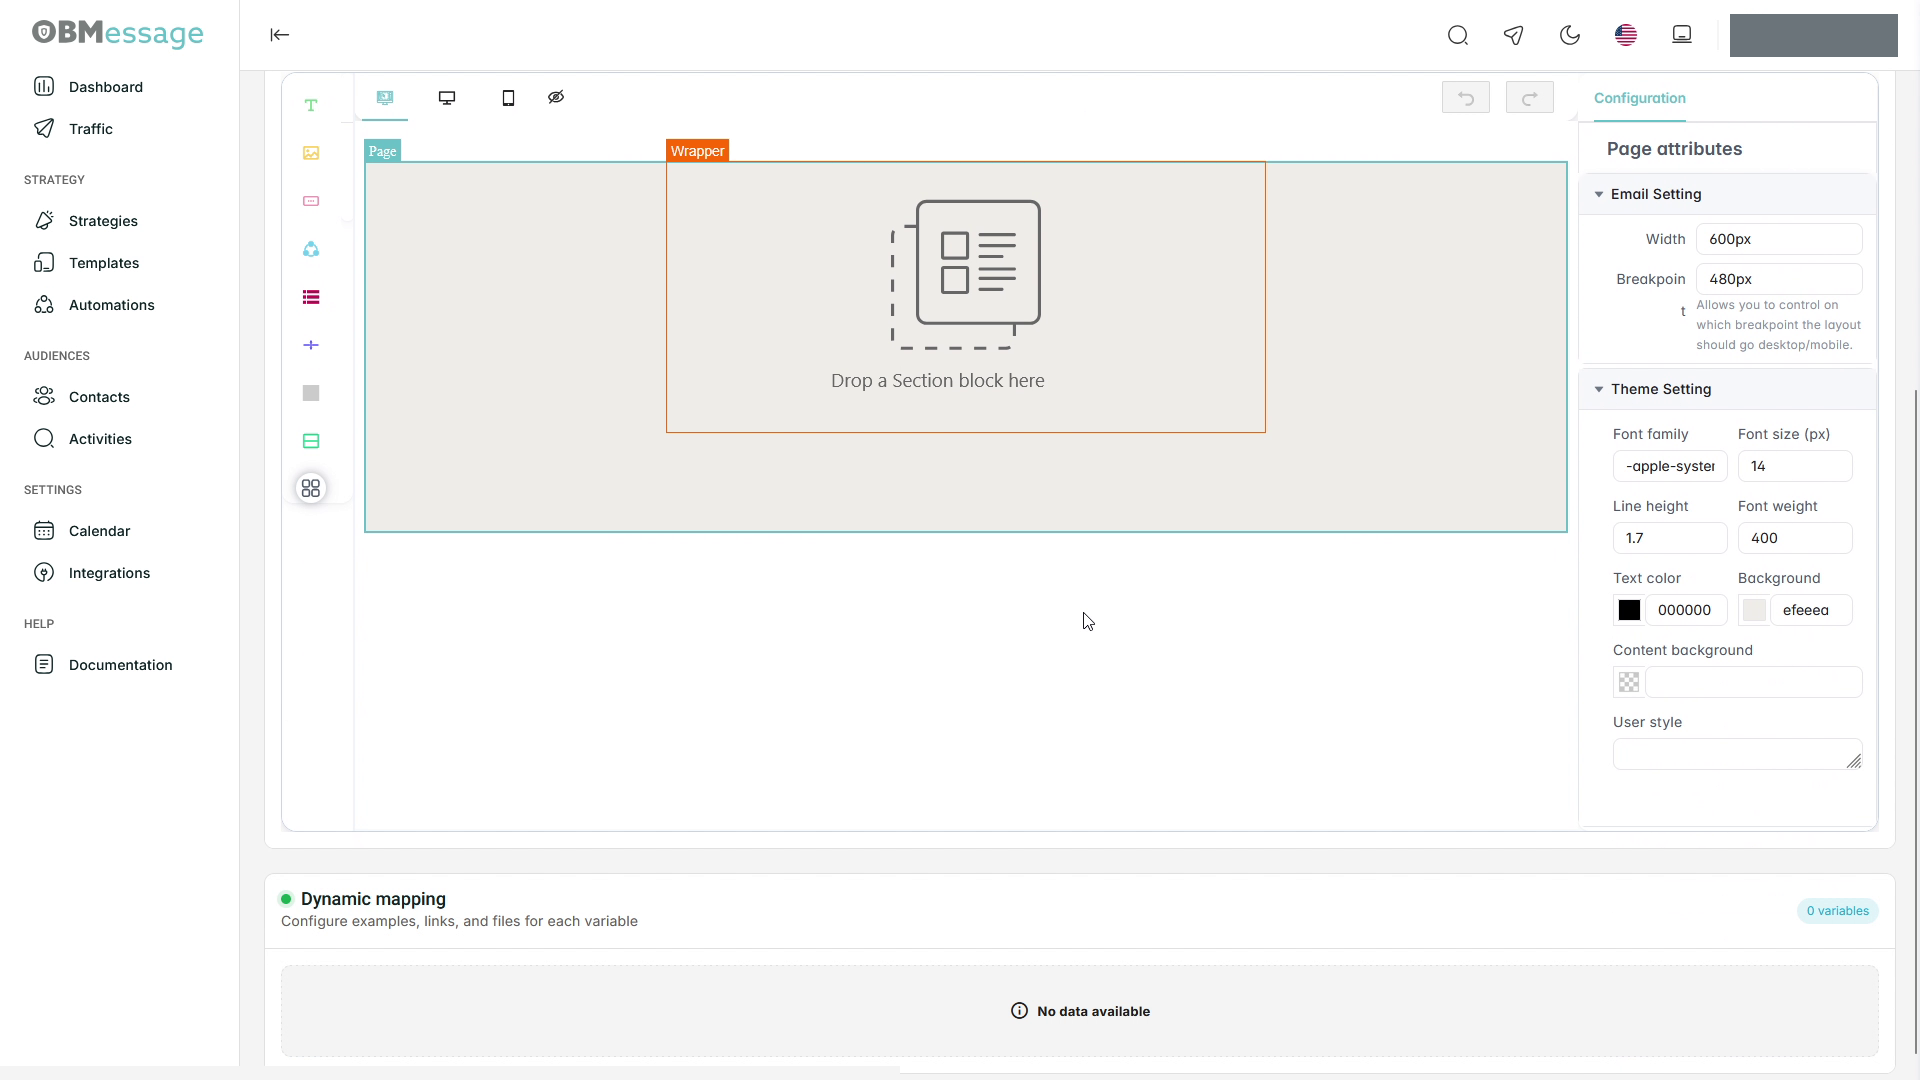
Dynamic mapping contains the example values, links, and files associated with variables. Complete them before publishing to check personalized content.
Check the result
When complete, the template appears under the Email tab with its subject and current status.
Reopen the template to verify the saved content. To review a test before using it in a strategy, see Service test.